Home.
November 2021 - Circuit Boards and the Dremel
When I started with the hobby there were perhaps three popular ways to make electronic circuits. There were tag strips, veroboard and printed circuit boards. Magazine articles often included the PCB pattern and left you with the issue of reproducing it.
So there was sometimes a high entry level into constructing published projects.
That PCB process became easier as techniques such as "toner transfer" became popular and I've produced some boards that I'm rather pleased with. But it is still quite a lot of work.
For a while (and perhaps still), the Manhattan method of gluing pads was also popular in QRP circles and even became rather an art form when practiced by folk like Jim Kortge K8IQY. 
I have noticed that carving patterns into copper board using a drill - such as the Dremel, is now becoming more popular - and if you need a tutorial then look no further than the excellent You tube videos from Nick M0NTV. Or as Nick does, use a cheaper Dremel clone. This is the version that often appears in the UK ALDI stores:-
They come with the required grinding attachments and often costing less than £20. This is all you need to make circuit boards as Nick demonstrates.
For best results you need to plan ahead - rather than start hacking away at the copper board, and Nick does this by working out what pads are needed. His finished product often looks like the schematic and that makes for an easier construction.
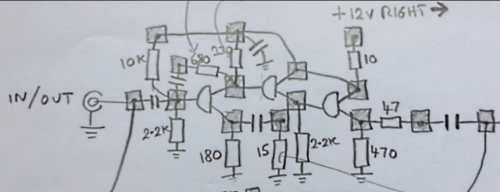
The little square pads on the drawing translate to the pads that Nick cuts.
Compared to the time that it used to take me to design and etch a board, this is far quicker and much much cheaper. It also avoids using superglue which the Manhattan method employs. Horrible stuff that sticks better to me than copper pads.
Do please check out Nick's channel and this video in particular.
Another method which has been popularised by Pete N6QW is to design his pads on his PC and then he sends the design to his CNC machine. These devices cost a lot more than a Dremel clone.
Pete uses a "chessboard" layout and the end product is appealing in look and affords the opportunity for greater component density.
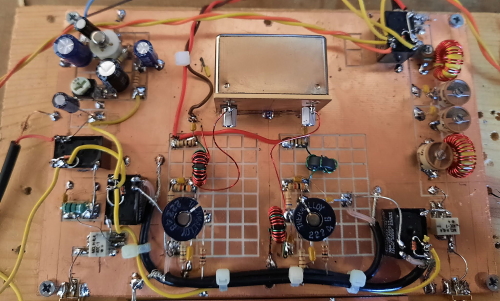
Obviously, lots of advanced planning has happened here - just as with etched PCB's. But Pete also builds in small modules. This is the audio board (below) for his recent PSSST SSB transceiver.
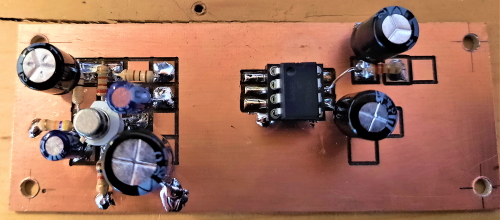
For the PSSST project, Pete's website also shows the boards clear enough that you could copy them if you also had a CNC machine. Or you could use a Dremel and come up with something similar - without perhaps the nice straight cuts. But it is still perfectly adequate.
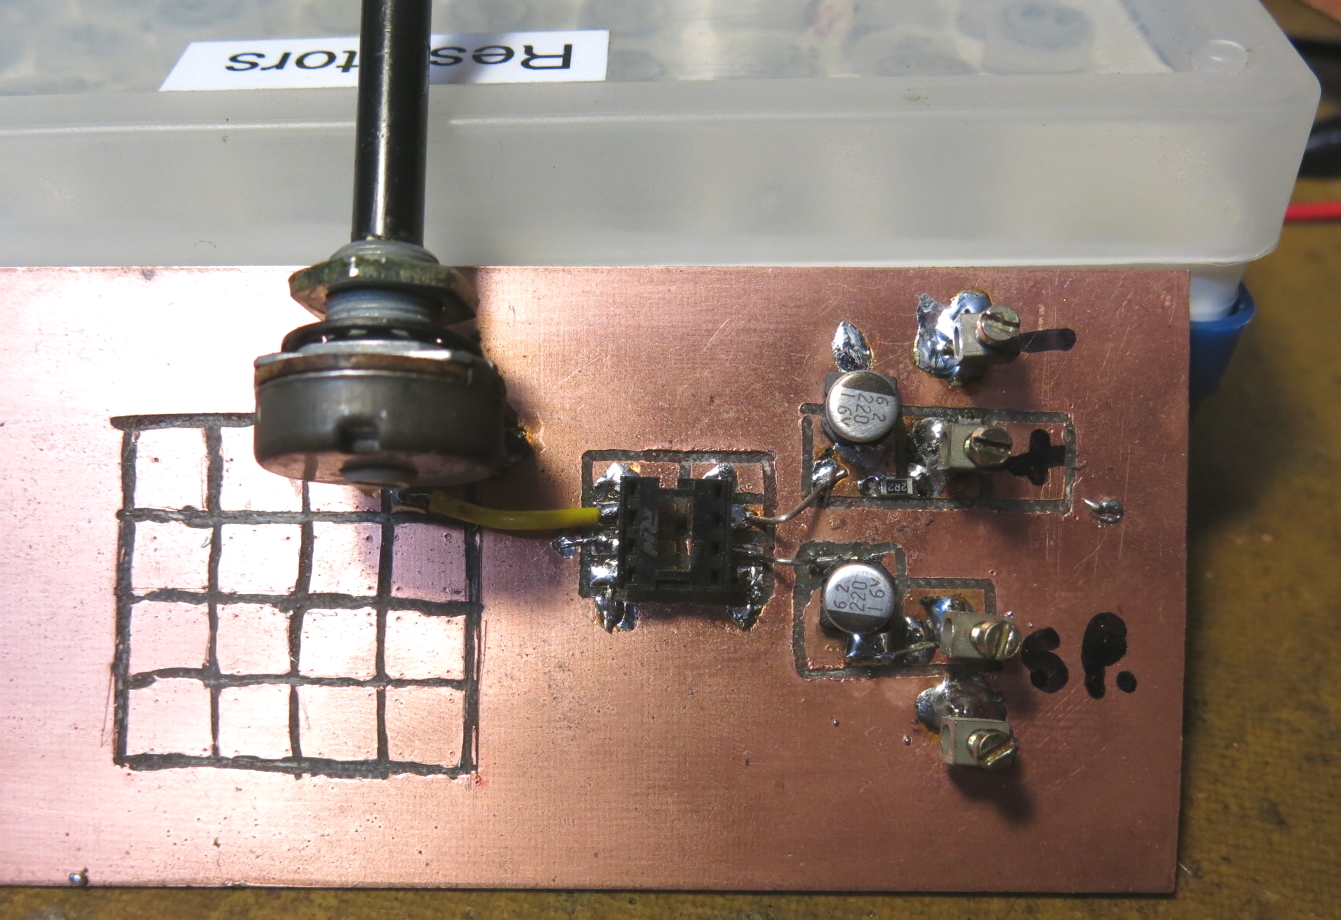
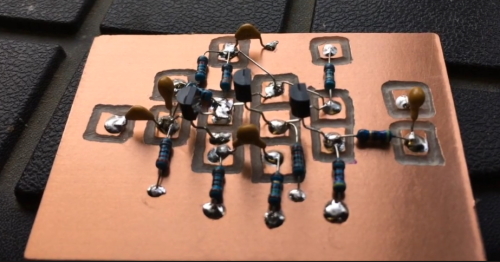
Mine is without doubt a far less pretty version of Pete's amplifier and the product of a hand that is less steady than a CNC machine. But it works. You might also spot that both the capacitors and a 2R2 resistor are surface mount types as this method of pads allow the easy use of these components and which are very cheap to buy.
I can't draw freehand like Nick M0NTV. So I created a 1:1 scale sheet with dots at 2.54mm pitch (or 0.1 inches). This is the pitch that DIL components (for example) use. So I can plan ahead too while copying Pete's layout.
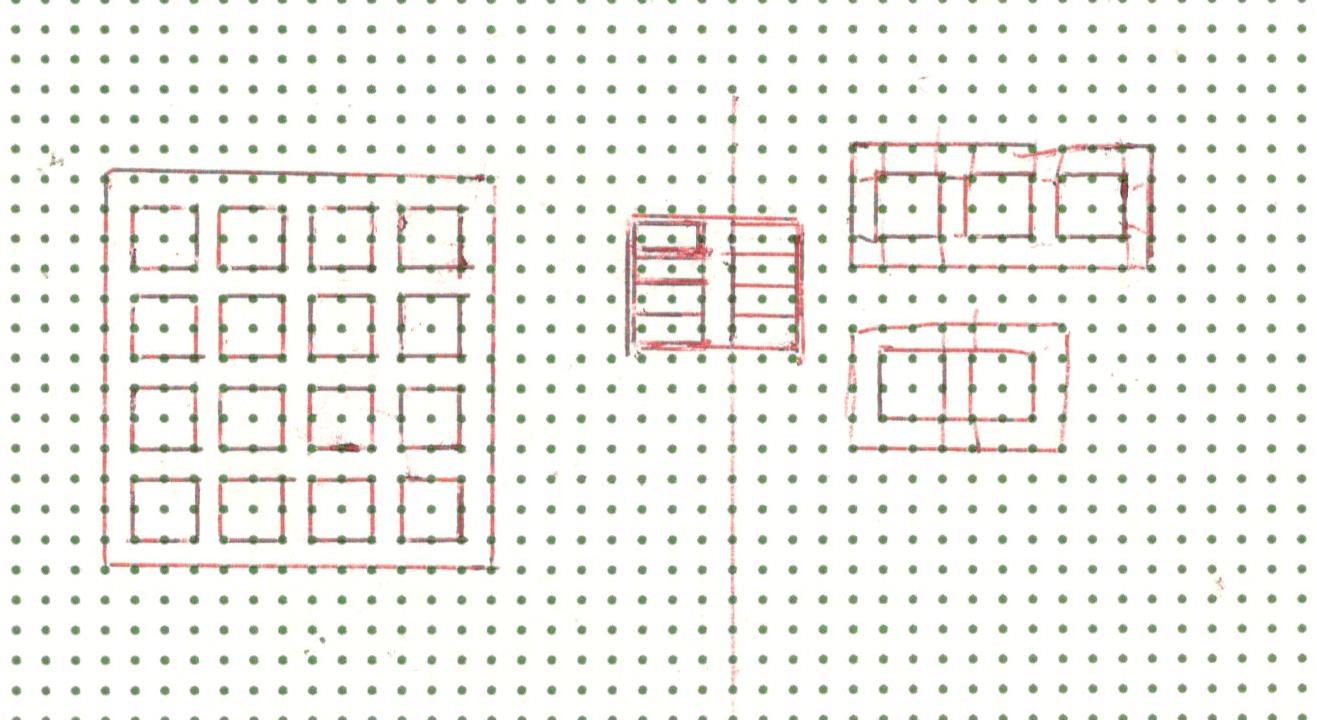
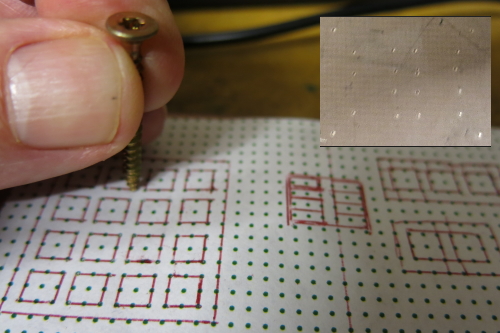
The pads I used were 5.08mm squared - but that isn't vital. What is vital is the size of the pads for the LM380 DIL chip. So I tapped a little dent into the board through the template and that allowed me to accurately dremel the pads.
I used hand held tools to recreate Pete's CNC PCB layout but you could also use a milling bit in a bench drill equiped with an X/Y vice. This produces quite a pleasing result.
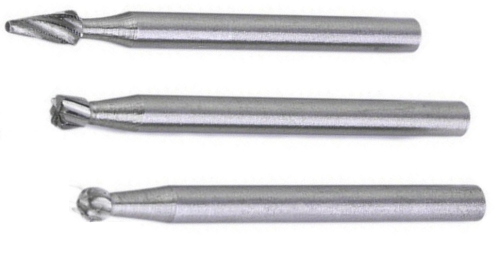
I found that the best attachment for cutting the copper to be burrs - like the dentist might use!
One last item of advice. A word of caution about minute fragments of copper flying about the shack, best done where they won't get into anything. Avoid using wire wool to clean the copper board for the same reason. A better way of cleaning copper board is to use one of these:
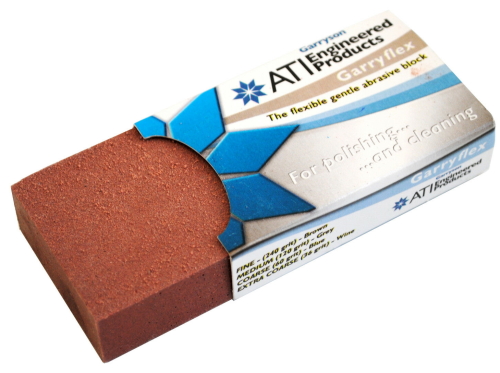
This is a grit impregnated rubber block costing around a fiver.
It is so long lasting that it you will be probably able to pass it down to your grandchildren.
I use the 240 grit version.